Everyone has different passions and they all have different ways to pursue them. We all heard the expression “ Gear doesn't make the photo, photographers make the photo”. Photography is the only career where you don’t need a degree & you only need talent to be a professional one. Capturing people emotions, pain, etc in the camera is an art. By becoming a professional one you can develop your skills and you can also have more opportunities to grow your career. Choosing the right https://www.rentoclick.com/category/camera.html, https://www.rentoclick.com/category/lens.html and https://www.rentoclick.com/search.html?searchBox=gimbal gives you the best result and while there are companies now who provide them on daily, weekly, and on a monthly basis.
• Practise post-production:

You need to do a lot of work on post-production. The post-production phase of creating a film usually takes longer than the actual shooting of the film and can take several months to complete because it includes the complete editing, color correction, and the addition of music and sound. Professional post-producers usually apply a certain range of image editing operations to the raw image format provided by a photographer or an image-bank. There is a range of proprietary and free and open-source software, running on a range of operating systems available to do this work.
• Understand Lighting:
For taking a perfect picture perfect lighting is required. A speed-light or flash is often the best photography lighting that’s on-site because of the portability. With an off-camera wireless flash system, speed-lights can do much of the work of studio strobes. Wedding and sports photographers tend to favor speed-lights because of that portability, as well as the flexibility since the same light can also be mounted on-camera. Speed-lights aren’t perfect though. They don’t reach as far as https://www.rentoclick.com/brand/lights-stand.html, the light isn’t as strong and they can take longer to be ready for that next flash of light.
• ISO & Exposure Tips:

ISO is actually an acronym, which stands for International Standards Organization, which is the organization that standardizes sensitivity ratings for camera sensors. The ISO rating, which ranges in value from 25 to 3200 (or beyond), indicates the specific light sensitivity.
The lower the ISO rating, the less sensitive the image sensor is and therefore the smoother the image, because there is less digital noise in the image.
The higher the ISO rating (more sensitive) the stronger the image sensor has to work to establish an effective image, which thereby produces more digital noise (those multi-colored speckles in the shadows and in the mid-tones).
• OverExposure & Under Exposure:

Overexposure is when the information in the highlights is effectively unreadable. When there is this type of excessive loss of image information there is no way to “retrieve” that missing information in the digital darkroom.
Underexposure is pretty much the same concept; except, in this case, there is no image information contained within the shadows. This non-existent information cannot be retrieved through post-processing either.

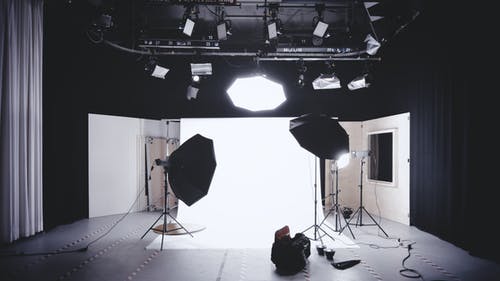
• Knowing Correct background/ frame:

As you can see, choosing the right background or backdrop for your subject can be just as important as choosing the right lens for the shot. There are a few key factors when deciding on the right background/backdrop for your photoshoot.

Some of those considerations include:
• What are you shooting… a product or person? Shooting a product typically requires a crisp and clean background to give all focus to the subject.
• What look and feel does your client want? Your client might be a corporate officer just looking for a timeless headshot where a canvas background would do the trick or your client may want an edgy image where a floor drop might work as a great background.• What mood are you trying to convey? Are you looking for something dark and moody? A plain black seamless paper or muslin could do the trick. Perhaps you are trying to recreate a scene. Here a painted backdrop and a floor drop would be a great choice.
• How much weight can you carry? Some backgrounds like canvas and vinyl can weigh a lot whereas muslin and a short roll-off seamless can weigh very little.
• How much room do you have for a backdrop? While many backgrounds come in various sizes, if you have a small 8-foot space to shoot, a 9-foot roll of seamless may not be ideal and you may need to get a shorter 53” roll instead.
• What is your budget? While muslin and the support needed to set it up is very low cost, painted canvas and some floor drops can cost up to a couple hundred dollars.
No comments:
Post a Comment